I came up with some adorable ideas. I was thinking of posting the "how to" instructions for some of them.
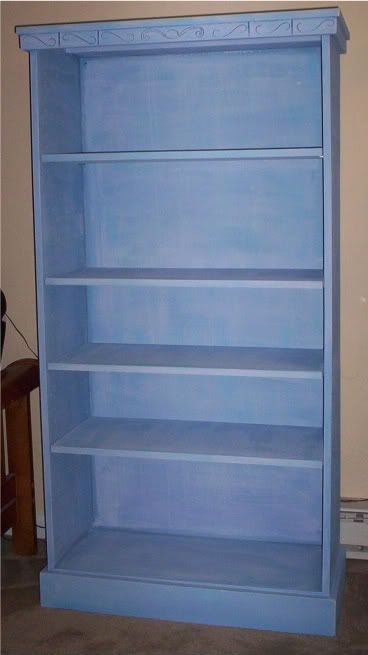
First up, this unfinished bookcase. My husband built it for me, and I had yet to do anything with it. Now I am glad I waited.
This piece was inspired by a post on Be Different...Act Normal. She has great decorating ideas, and since I started following her, I haven't missed a post. Her post described how to transform a piece of old furniture with molding and trim and some paint. Well, if I waited for my hubby to get around to the trim it might take another 3 years. So I came up with my own plan.
OK, so we have an unfinished pine bookshelf.
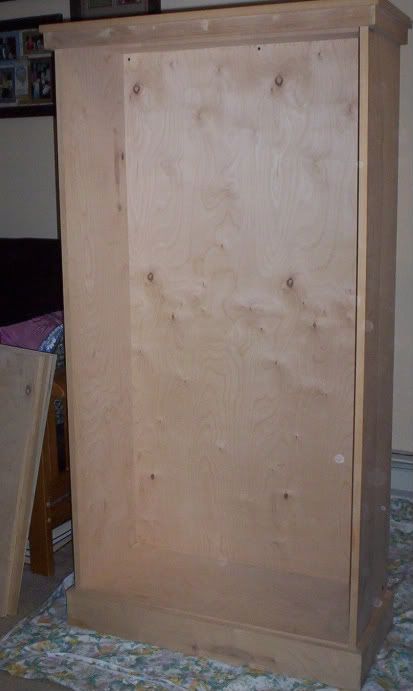
First, I sanded and primed it. I just used the 'sandy feet' for primer since I had so much left over.
Once the paint was dry, I roughed up the area I wanted to decorate with sand paper. Then I started the process of skim coating the sides and top edges, with drywall mud. This part will take some time. The idea is to slowly build up a 1/4 inch layer of drywall mud on the surfaces. You have to wait for each layer to dry. I ended up putting 4 thin coats of mud on it. It took about 2 days to prime and mud. I didn't bother sanding between mud coats, or fixing any boo boos. I am going for the distressed look here.
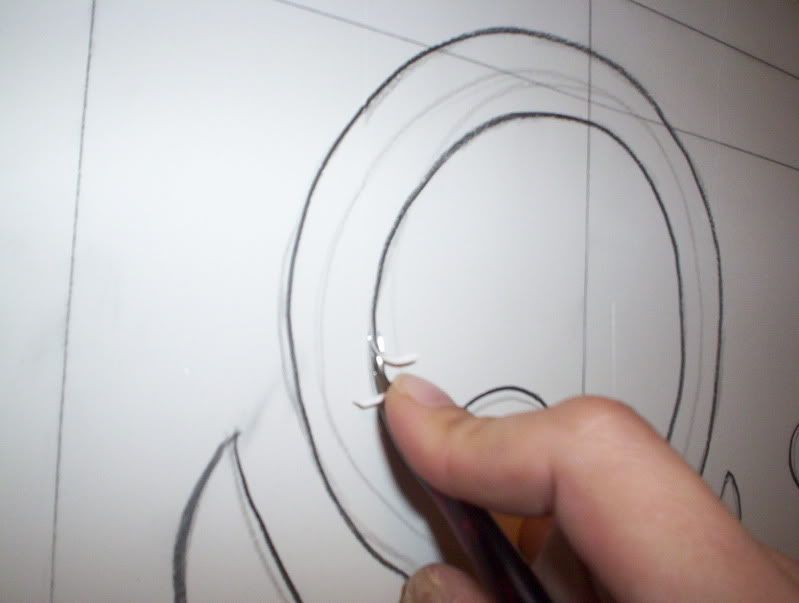
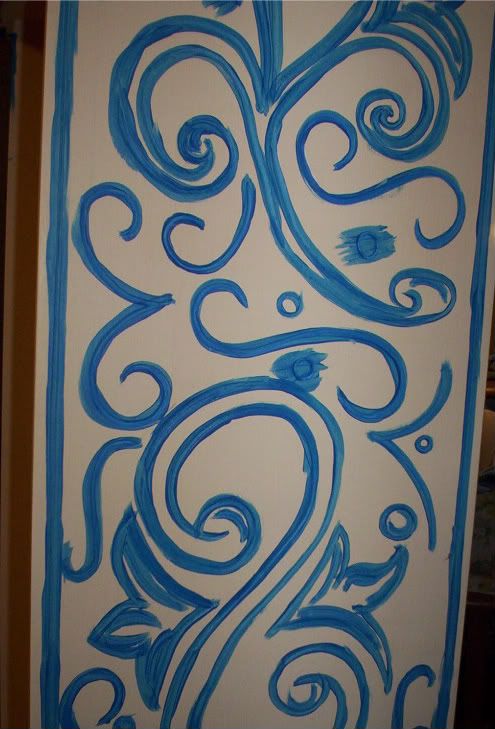
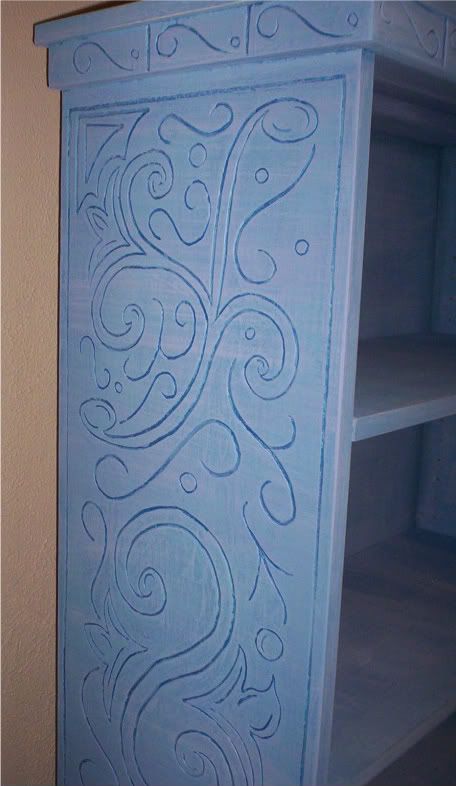
After letting the last layer dry over night, I marked off a grid on the sides. I broke the space into 4 equal parts and marked off a 1.5 inch boarder around all of the edges, and marked a center line.
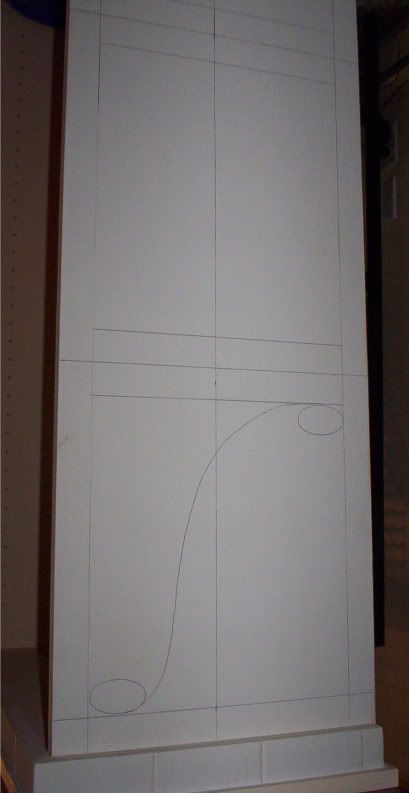
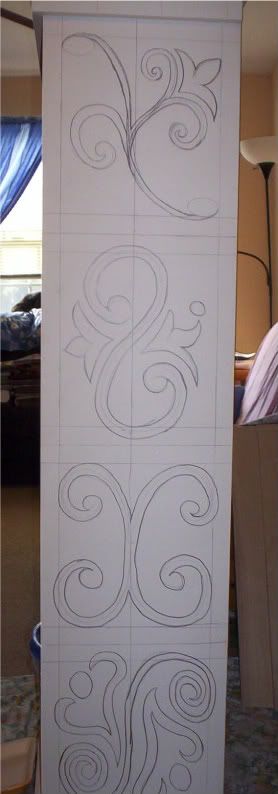
Now on to the fun part. I free handed some filigree into the spaces with light pencil lines. Once I was happy with the design, I darkened the lines I wanted to keep with a black colored pencil.
Warning: This next part can be painful, depending on how big your piece is. You may want to wrap your fingers in bandages to prevent the blisters.
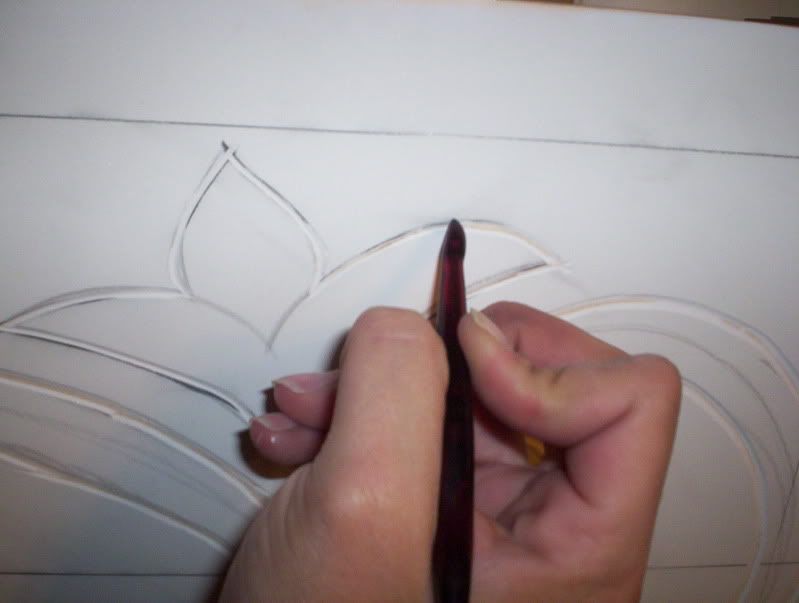
Carving. To carve the designs into the drywall mud I used a variety of "tools" that I had at the house. No specials tools needed. I used a cuticle cutter, a cuticle pusher (which is now destroyed but totally worth it) and a sharp tri-pointed tool. I have no idea what it was or where it came from, but it worked well. I suspect if you have a rotary dremel tool, that will make this whole thing very easy, but I don't, so...
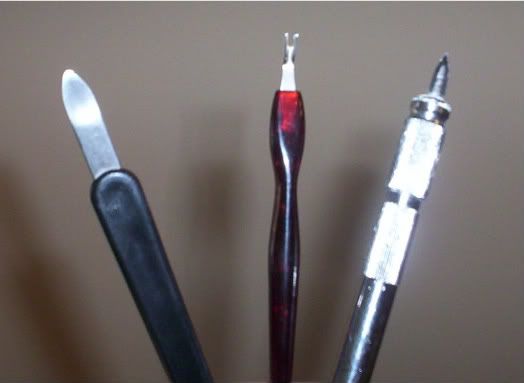
I carved each design in 3 steps. First I cut into the lines with the cuticle cutter and the tri-piont. Then I further dug out the ditch with the cuticle pusher, which gave the design a V shape. Then I rounded out the edges of the V shape with the back end of the cuticle cutter, which had a small round bottom.
I dusted it all out and wiped it down with a wet cloth. To see if I needed to add to the design I painted the panels. I did need to add to it, so I filled in the open spaces and cut those out too. (By now my fingers are killing me.)
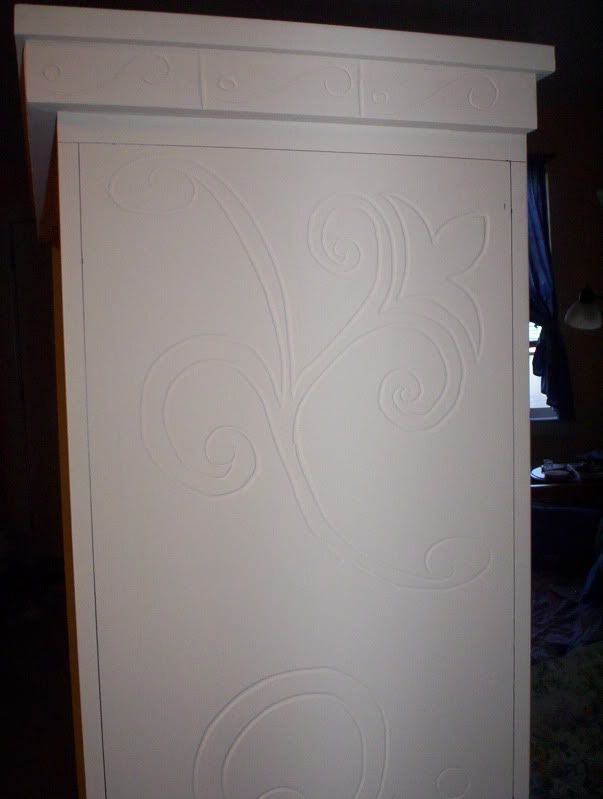
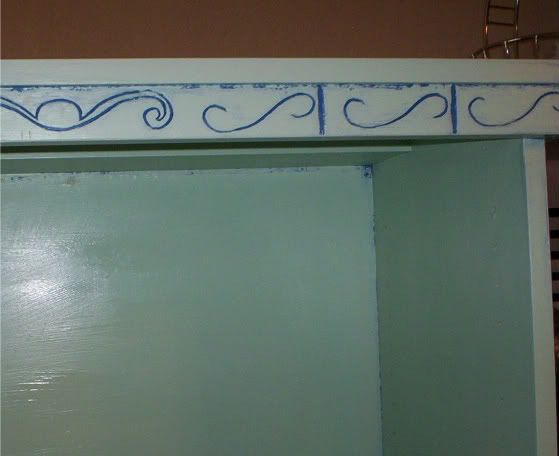
Next I took a dark blue acrylic paint and a small brush and filled in all the grooves. I put 2 coats on. (Since I am going for the distressed look, I also painted some of the corners dark blue.)
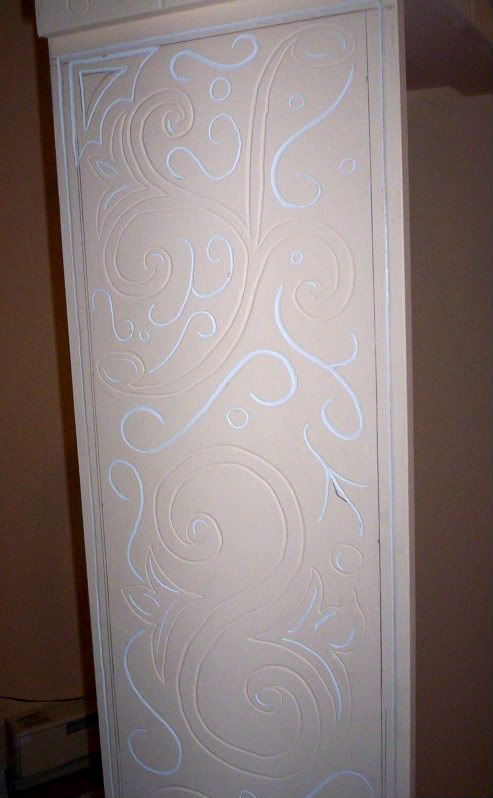
Once that was set up, I started the painting process. I put several thick coats of different colors so I can further distress the piece, but you don't have to do that. I started by "DRY BRUSHING" over my designs. Using a 3" cheap paint brush with a very little TINY amount of paint on it. Brushing over the designs lightly in one direction. The idea being to keep the paint out of the grooves, for the most part. Then I painted the rest of the shelf normally with the same contrasting color.
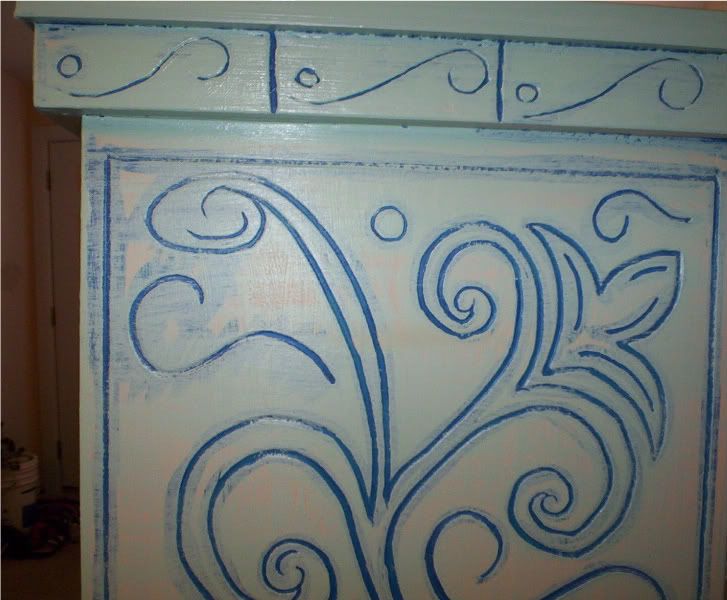
Next I dry brushed over the design again, going in the opposite direction of the first coat. Keep doing this until all the flat spaces are coated. Use a smaller brush to get the stubborn spots. Just don't get it in the grooves.
At this point you could seal the piece or keep adding to the paint and distress it like I did.
I kept adding thick coats of green, light blue and darker blue, (Dry brushing over the designs) letting each layer dry properly. I did the same for the shelves.
Once I was done painting, I lightly sanded some of the corners, and the edges of the shelves. There you have it. Cool looking bookshelf using things I already had.
Wow, that's freaking fabulous! I love the carved look but I don't think I would have the patience to do it myself.
ReplyDeleteOMG! That turned out fantastic!!
ReplyDelete